jueves, 2 de diciembre de 2010

Demoreel .11

Hey, so finally here is the new demoreel, version .11.
Unfortunately I wasn't able to use all the new works I did.
Oh well, next time...

Demoreel .11 from Paolo Martini on Vimeo.

Abhimanju

It's been a couple of months or so that I was contacted from India to develop a concept for the animation of a title sequence.
Well, the first 9 secs were developed in less than 2 weeks in 3D studio, FumeFx, AE and Particular (of course).
But know I have been requested to change the subject and create a new "movement" from scratch.
This time I worked mostly in 2.5D in AE which seemed to me the best choice having no much time.
Well, here are the first results.


And here is the old "fire" version:

jueves, 11 de noviembre de 2010

Wheel of fortune

While waiting a f**king endless rendering for a cinematographic intro in 2K (oh man, I start to be fed up of this things), I decided to participate to an interesting 5 secs mograph competition. Since it was the last days of october you can imagine what the subject was: the nightmare, of course.
So here it is. It's a small animation I did in five days, in the spare time. Some photoshop, mostly AE, and some 3D studio to animate the final cards.

Wheel of dreams from Paolo Martini on Vimeo.

martes, 19 de octubre de 2010

Time for tutorials

It's been a month or so since I was contacted from Rampantmediadesigntools.com to submit a tutorial on some After Effects techniques.
So after a couple of days thinking about what cool feature I could work on, I realized that maybe would have been interesting to check out some 3d camera and expressions stuff in order to give a more cinematografic look to animations.
Here's the result.
And I'm glad to know that it's the most watched and liked of the Vimeo channel. ;)

RampanTV Tutorial - Achieve A More Cinematic Look in AE from Rampant Media Design Tools on Vimeo.

martes, 7 de septiembre de 2010

GOTICA

After so much time I stumbled in my 2003 short movie which took so much effort at that time. Two days of shooting, no budget, good friends and a lot of passion. This was the perfect recepy to try to do something professional.
After all these years I feel kind of melancoly about it. Like a good old friend you don't see in a while.
Well, here it is. Full version, subtitled in english.

Remember: TWO DAYS OF SHOOTING! ;)

Gotica from Paolo Martini on Vimeo.

sábado, 31 de julio de 2010

Human Nature

So hi everybody.
It's been a while since my last post and actually there are some good news to share.

First, due to the high number of foreign friends I thought time has come to write in English.

Second, I started a collaboration with Rampantdesigntools.com as Trainer in the AE area. So please check out rampantdesigntools.com and leave comments.

Third, I am working on a new project that soon will be finished.
An intro for a documentary about drugs and alcohol and how and why they change human behaviour.
I am working with a dark mood and tone here, so check it out soon.
Here some pics:


There's a lot of stuff here going on: displacement map, card dance, starglow, wave...
I think I'll do a tutorial about that.

In short time I'll post the intro which should be about 30 seconds in lenght.
So, keep in touch.

lunes, 24 de mayo de 2010

Tropic of Blood

Posto ora il trailer del film Tropico di Sangue al quale ho lavorato per gli ultimi mesi. Si tratta di una co-produzione americo-francese nella quale spicca come protagonista Michelle Rodriguez, gia' famosa per Avatar, Fast and Furious, Lost.
Il trailer, realizzato in 3 giorni, e' stato rifinito in Final Cut e colorato con Color. Il film e' stato misto 35mm e RED, e nella post ho potuto realizzare anche alcuni lavori in Boujou, 3D studio e FumeFx.

jueves, 8 de abril de 2010

SPOT LOTTERIA 50"

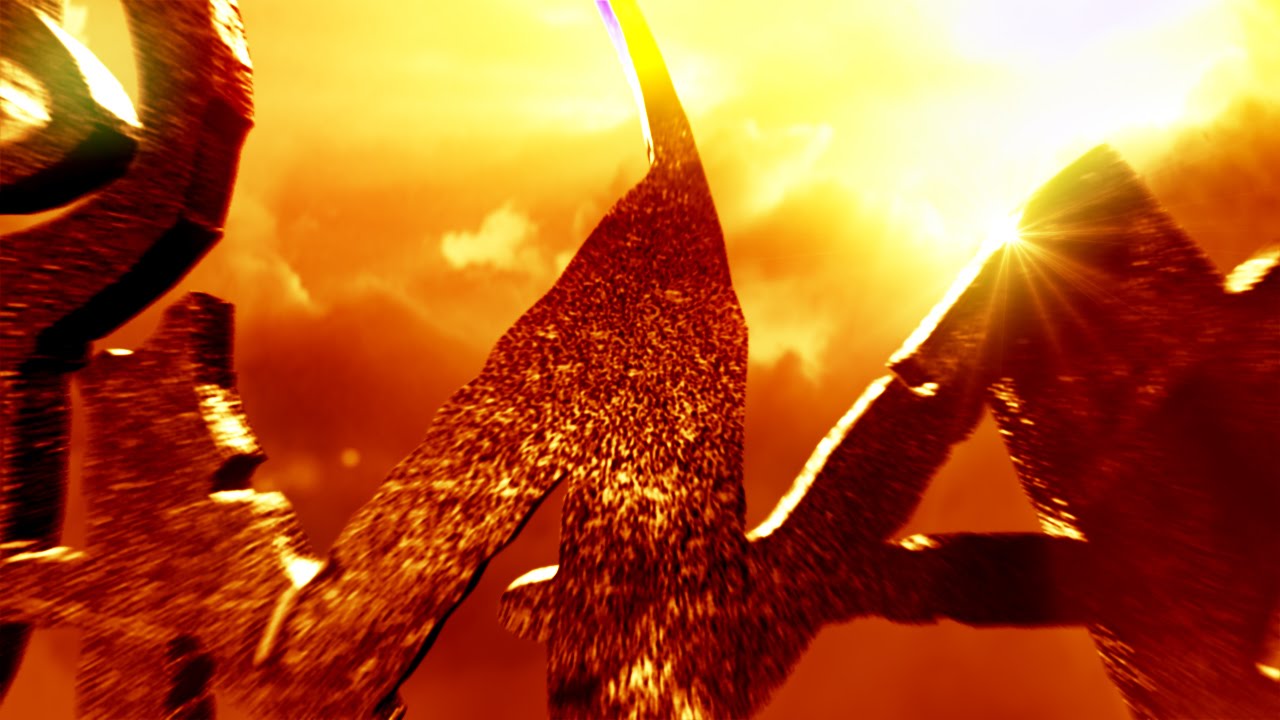
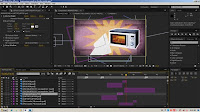
Appena completato il nuovo spot per la Loteria Nacional, un 50” misto on location e motion graphics che ha portato via tre giorni di lavoro.


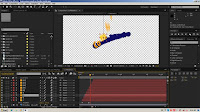
Anche in questo caso, come in molti altri, i software utilizzati sono stati Photoshop, Illustrator, 3DStudio Max e After Effects, con particolare uso di KeyLight, Trapcode Particular, Looks, Vector Paint e Bezier Warp.
3D Studio e’ stato usato per creare delle semplici animazioni di testo in Extrude. Esportate in RPF, sono state poi compositate in AE.


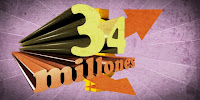
Illustrator e’ stato molto comodo per importare i tracciati del logo in AE. E’ tecnica molto valida per lavorare con animazioni che necessitano per esempio di distorsioni dello scale, dato che importando tracciati non si perde la qualita’ anche quando le grafiche vengano ingrandite.
Altra utilita’ e’ l’avere automaticamente maschere da animare con Stroke o Trapcode 3D Stroke. Questo spesso snellisce un lavoro che richiede molto piu’ tempo se dobbiamo ricrearle ex novo con il pen tool.
Unico neo e’ il fatto che i tracciati di AE vengono importati come Maschere su un solid layer. E’ necessario quindi controllare come si intersecano tra loro per poter gestire bene i diversi livelli da animare.


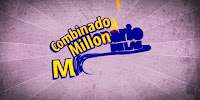
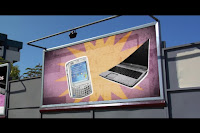
Vector Paint e’ stato usato per creare l’effetto scratch sui premi del gratta e vinci. L’animazione e’ del tutto manuale usando il pennello grandezza 40, velocita’ 10. Semplicemente ho dipinto sopra le foto e poi ho impostato la tinta in inverted matte. In questo modo, ogni pennellata fa apparire la foto sottostante.
Il contro di Vector Paint e’ il fatto che non si possano annullare le operazioni. Quindi, per ogni errore di pennellata c’e’ da ricominciare tutto da capo. Meglio quindi fare delle prove.


Creata una Composition per le animazioni (960X480) e’ stata poi inserita nel footage. In alcuni casi si e’ trattato semplicemente di Mascherare il 6X3 alle spalle dell’attrice. In altri casi, ho dovuto bucare un Green Screen con Keylight e ricostruire un pezzi di inquadratura per farlo combaciare nella composizione.


Tocco finale, il CC con Looks. E’ stato aggiunto un po’ di contrasto e di diffusion e ho insistito con curves sui toni rossi.
Il tutto come ho gia’ detto in quattro giorni.
From scratch.


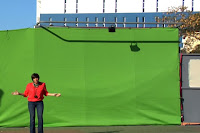
Inutile decantare le lodi del solito Keylight per bucare il verde. Nonostante diverse ombre fastidiose il risultato e' stato ottimo e rapido.


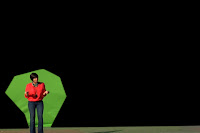
Solo una piccola maschera intorno alla figura e il key e' stato assicurato praticamente con impostazioni base. Solo una aggiunta di un Matte Choker minimo per sfumare i bordi.